- Setting up your account
- Account Settings
- Importing KPIs
- Importing Data
- Data Integration
- Creating Groups
- Using the date control
- Customizing your account
- Using Zapier to import your data
Importing Data into SimpleKPI
As well as entering data manually into your SimpleKPI account using the Data Entry Tab, you can also automate data entry in a number of different ways.
Contents
- Importing data from a spread sheet
- Data structure
- Additional structure types
- Emailing data into your account
- Connecting to a Google Sheet
- Developer API
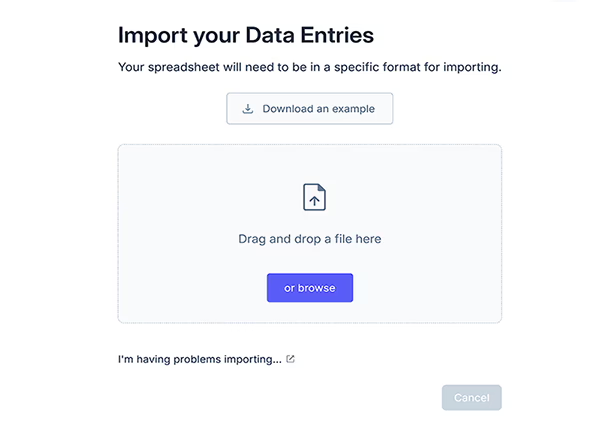
Importing data from a spread sheet
One of the easiest ways to bulk load your data is by using a spread sheet containing your data.
Your data will have to be structured in the predefined template in order to import into the system. Once you have set up your KPIs you can download your own KPI template by clicking on the Here's a template file link in the import from an excel drop down menu.
To upload a spread sheet containing your data:
- Go to the Data Entry Tab
- Click the 'Import data' Button
- Select your KPI Spread sheet file
- Click Upload and Import
Once your file has been successfully loaded the data will appear in your account
Data Structure
The KPI template must conform to the following column structure in order for it to be loaded into SimpleKPI.
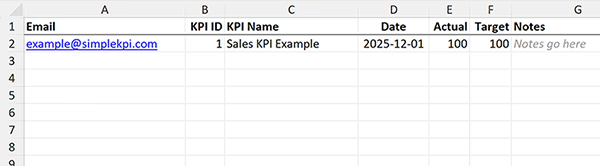
- Email: The email address of the user that has the KPI assigned to them.
- KPI ID: The unique ID number given to each KPI
- KPI Name: The name of your KPI
- Date: The date of the entry
- Target: (Optional) the target amount for the KPI Entry
- Actual: the data entry
- Notes: (Optional) Any notes against the KPI
Additional Data Structures
There is also a secondary data structure that is compatible with SimpleKPI, this involves arranging the column names to match the names of the KPI. Please note that this data input structure does not allow for notes, Targets and KPI ID’s to be entered against a KPI. It is therefore only suitable for bulk loading KPI data when there are either no targets or the targets are consistent and there are no notes to be added to the entries.
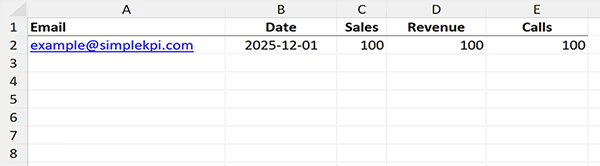
Create a spread sheet with the following columns:
- User – The email address of the user you wish to enter data against
- Date – The date of the KPI Entry
- Subsequent columns should be named exactly the same as the KPI Name in your system.
Connecting to a Google Sheet
SimpleKPI allows you to connect directly to a Google Sheet to import your data. Once the connection is made via data integrations, SimpleKPI will periodically import the data at specified time frames.
To connect to your Google Sheets:
- Go to the Data Sources page located in the navigation dropdown
- Click the Storage Menu item and then select the Google Sheets integration
- Choose the Google Account connected to the sheet
Note: Your Google Sheet date format must follow the ISO 8601 YYYY-MM-DD format
Once your Google account is connected, please use the dialog box to set the following:
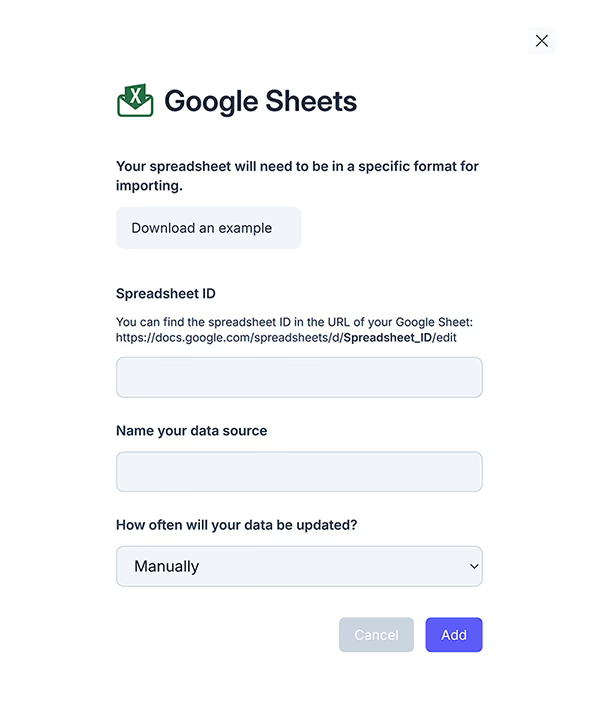
- Enter the ID of your sheet (this can be found in the URL of the sheet)
- Give your connection a name
- Select the update frequency for the sheet
Emailing Data to your account
SimpleKPI also supports emailing of a spread sheet to your unique SimpleKPI address where the spread sheet is automatically uploaded into the system.
To send a spread sheet to your SimpleKPI email address:
- Go to the settings option in the additional tabs drop-down
- Under Company info make a note of your unique SimpleKPI email address
Note: Only admin and owner users have access to the system settings. Additionally the email spread sheet functionality is only available to standard and enterprise plans.
- Create your spread sheet as per the structure detailed above
- Email the spread sheet as an attachment to your unique SimpleKPI email address
Developer API
You can automate data feeds to and from SimpleKPI using the Developer API. The API will allow you to use XML or JSON.
To integrate the developer API you may need to obtain specialist development skills.
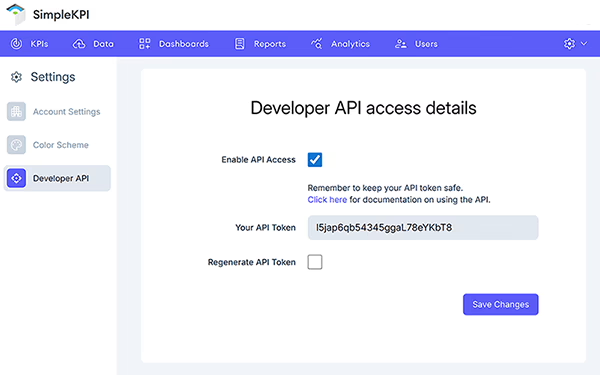
To access the API you will need your unique authentication code which can be obtained by:
- Click on the settings button located in the additional tabs drop down menu
- Click the Developer API button located in the left hand menu.
- Your API Token is displayed in the access details panel.
- To regenerate your Token, click the regenerate API Token checkbox.
- Click Save Changes
Your development resource can then use this token to access your SimpleKPI data.
More information regarding the API can be found here.